How to sharpen a kitchen knife is something every home cook should know. A dull knife is more dangerous than a sharp one — it requires more force, slips off food more easily, and makes every prep task take longer and more frustrating. The good news is that learning how to sharpen a kitchen knife at home is entirely straightforward once you understand the tools and technique involved.
This guide covers three different sharpening methods — whetstone, honing rod, and pull-through sharpener — so you can choose the approach that fits your tools and skill level.
Why Knife Sharpening Matters
Every kitchen knife loses its edge over time. The blade’s microscopic teeth — the cutting edge — gradually fold and wear down with use. Regular sharpening realigns and restores that edge. Here is why it matters:
- Safety: A sharp knife cuts cleanly with less pressure. A dull knife forces you to push harder, which increases the chance of slipping.
- Efficiency: Sharp knives make cleaner cuts through vegetables, meat, and bread — faster and with less effort.
- Knife longevity: Regular maintenance extends the life of a good knife significantly. Letting a blade get severely dull means removing more metal to restore it, shortening the knife’s lifespan.
Types of Knife Sharpeners
Before learning how to sharpen a kitchen knife, you need to know what tool to use. There are three main options, each suited to different needs:
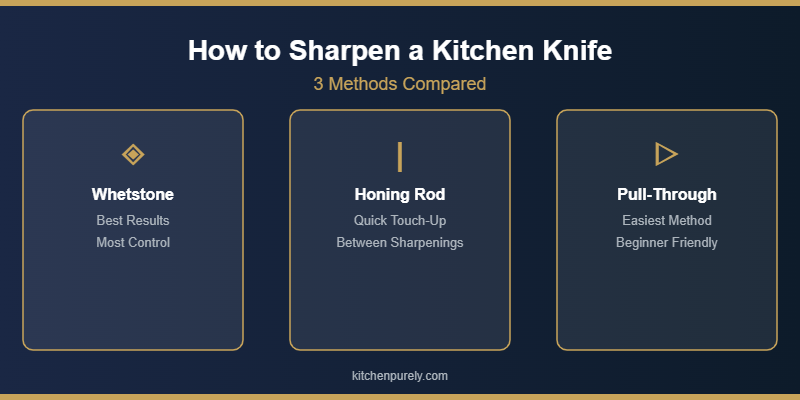
- Whetstone (sharpening stone): The most precise method. Takes more practice but gives the best result. Preferred by professional chefs and serious home cooks who want full control over the edge angle.
- Honing rod (sharpening steel): Does not actually sharpen — it straightens and realigns the existing edge. Best used between full sharpenings to maintain the blade. Most effective when used regularly after every few cooking sessions.
- Pull-through sharpener: The easiest option. Works quickly and requires no technique to learn. Removes slightly more metal per use than a stone, but perfectly fine for everyday home kitchens.
How to Sharpen a Kitchen Knife with a Whetstone
A whetstone gives you the most control and the sharpest result. Here is how to use one correctly to sharpen a kitchen knife:
- Soak the stone. Soak a water stone in water for 5 to 10 minutes before use. An oil stone needs a few drops of honing oil instead.
- Set your angle. The angle is the most important variable when you sharpen a kitchen knife. Most Western kitchen knives sharpen best at 20 degrees per side; Japanese knives typically use 15 degrees. A simple guide: hold the knife at 90 degrees to the stone, halve it to 45, halve it again — that gives you roughly 22 degrees, close enough for most Western blades.
- Start with the coarse side. Place the blade edge-first at your angle on the coarse grit. Using moderate pressure, push the blade forward and slightly across the stone (heel to tip) as if slicing a thin layer off the surface. Repeat 6 to 10 strokes per side.
- Switch to the fine side. Flip the stone to finer grit. Repeat with lighter pressure, 6 to 10 strokes per side. This refines and polishes the edge.
- Strop or hone. Run the blade a few passes on a honing rod or leather strop to remove the wire edge (a tiny burr left from sharpening). Wipe the blade clean.
- Test the edge. Carefully drag your thumb across (not along) the blade. A sharp knife catches slightly on the skin. Or slice a sheet of paper — a properly sharpened kitchen knife cuts cleanly without tearing.
How to Use a Honing Rod
A honing rod should be used every few cooking sessions to keep a sharp knife performing at its best between full sharpenings:
- Hold the rod tip-down on a cutting board or counter, or hold it horizontally in front of you.
- Set the angle. Place the heel of the knife at the top of the rod at about 15 to 20 degrees from the steel.
- Draw the blade down. Sweep the blade downward along the rod from heel to tip, maintaining the angle. Use light, even pressure throughout the stroke.
- Alternate sides. Repeat on the other side of the blade. Do 4 to 6 passes per side.
A honing rod does not remove metal the way a whetstone does — it simply realigns the edge fibers. If the knife is genuinely dull, honing will not restore it; you need to sharpen it first on a stone or pull-through sharpener.
How to Use a Pull-Through Sharpener
Pull-through sharpeners are the fastest, most beginner-friendly way to sharpen a kitchen knife at home. Here is how to use one properly:
- Start with the coarse slot. If your knife is noticeably dull, begin with the coarser V-slot (usually labeled “coarse” or “rough”). Place the blade’s heel at the slot entrance.
- Pull slowly. Draw the blade toward you through the slot using steady, light pressure. Pull from heel to tip in one smooth motion — do not press hard, let the sharpener do the work.
- Repeat 3 to 5 times, then move to the fine slot for 2 to 3 additional passes to refine the edge.
- Wipe the blade. Remove any metal shavings from the blade before using the knife.
Pull-through sharpeners are convenient but more aggressive than a whetstone — they remove more metal per use. Avoid using them too often on high-quality knives. They work best for everyday stainless-steel kitchen knives used for regular home cooking.
How to Tell If Your Knife Needs Sharpening
Before you sharpen a kitchen knife, use these quick tests to confirm it actually needs attention:
- Paper test: Hold a sheet of paper vertically and slice downward with the knife. A sharp blade cuts cleanly; a dull one tears or drags along the edge.
- Tomato test: Try slicing a ripe tomato without pressing down. A sharp knife glides through the skin; a dull one squishes and drags.
- Thumbnail test: Carefully rest the blade on your thumbnail at a slight angle without pressing. A sharp edge catches; a dull one slides straight off.
For most home cooks, a full sharpening every 3 to 6 months — plus regular honing — is the right rhythm. Heavy daily cooks should sharpen every 1 to 2 months. According to Serious Eats’ guide on knife maintenance, even the best chef’s knives lose their edge with regular use and need consistent attention to stay safe and effective in the kitchen.
If you are also considering upgrading your blades entirely, our guide to the best kitchen knife sets breaks down the top options for every budget and cooking style.
Tips to Keep Your Kitchen Knife Sharp Longer
Once you know how to sharpen a kitchen knife, maintaining that edge is just as important as the sharpening itself. These habits will keep your knives performing better between sharpenings:
- Use a proper cutting board. Wood and plastic boards are gentler on knife edges than glass, ceramic, or stone boards. Cutting on hard surfaces dulls a blade significantly faster.
- Hand-wash your knives. Dishwashers are harsh on knife edges — the heat, vibration, and detergent all wear the blade down. Hand-wash with mild soap and dry immediately.
- Store knives properly. Loose knives in a drawer bang against other utensils and dull quickly. Use a knife block, magnetic strip, or blade guards to protect the edge.
- Hone regularly. Running a honing rod over your blade before each use keeps the edge aligned between full sharpenings.
- Avoid cutting acidic foods on the blade for long periods. Prolonged contact with highly acidic foods (citrus, tomatoes) can affect the metal over time.
These simple habits make a real difference — a knife that is stored, washed, and honed correctly will hold its edge much longer and require sharpening far less often.
Pro Tips to Get the Best Results When You Sharpen a Kitchen Knife
Once you know how to sharpen a kitchen knife using the basic methods, a few extra habits will help you get sharper edges and make them last longer.
- Use a sharpening guide for consistency. If you struggle to maintain a steady angle freehand, angle guides that clip onto the blade are inexpensive and very effective for beginners learning to sharpen a kitchen knife on a whetstone.
- Work with progressively finer grits. If your knife is very dull, start with a coarser grit stone (220 to 400) to remove more metal, then move to a medium grit (1000), and finish with a fine grit (3000 to 6000) for a polished edge.
- Strop the blade after sharpening. Stropping on leather or even the back of a leather belt aligns the very tip of the edge at a microscopic level, giving you a noticeably keener edge with just a few passes.
- Test on paper before you finish. Slice cleanly through a sheet of standard printer paper. If the knife glides through without tearing, you have a well-sharpened kitchen knife. If it catches or tears, give it a few more passes on the fine grit stone.
- Do not sharpen serrated knives at home. Serrated bread knives require special round sharpening rods matched to the tooth size. Unless you have the right tool, leave serrated blades to a professional sharpener.
Best Storage Practices After You Sharpen a Kitchen Knife
How you store your knives after you sharpen a kitchen knife is just as important as the sharpening itself. Poor storage dulls blades quickly and wastes your work.
- Magnetic knife strip: Mounts to the wall, holds knives by the spine, keeps blades from touching anything. The best option for preserving a freshly sharpened kitchen knife.
- Knife block: Use a horizontal slot block where the knife rests on the spine, not the edge. Traditional vertical slot blocks let the edge rest on wood, which gradually dulls it.
- Blade guards / sheaths: A good option for drawer storage. Protect the edge and prevent accidents when reaching into a drawer.
- Avoid knife drawers without guards. Loose knives banging against other utensils will quickly undo the work you put into sharpening.
Frequently Asked Questions About Sharpening Kitchen Knives
What angle should I use to sharpen a kitchen knife?
Most Western-style kitchen knives (German, American) sharpen best at 20 degrees per side. Japanese-style knives typically use a more acute 15-degree angle for a finer but more delicate edge. When in doubt, 20 degrees is a reliable default for everyday stainless-steel kitchen knives used in most home kitchens.
Can I sharpen a serrated knife at home?
Yes, but it requires a tapered ceramic rod or a dedicated serrated sharpener to work each individual serration. It takes more time but is doable at home. Most serrated knives hold their edge far longer than straight-edged blades, so you will rarely need to sharpen them — once a year or less for most home cooks.
How often should I sharpen my kitchen knives?
For a home cook using a knife several times a week, a full sharpening every 3 to 6 months is typically enough. Use a honing rod every few uses to maintain the edge between sharpenings. The paper and tomato tests are the simplest way to check whether it is time to sharpen a kitchen knife again.
Final Thoughts on How to Sharpen a Kitchen Knife
Knowing how to sharpen a kitchen knife properly is a small investment of time that pays off every single time you cook. Start with the method that matches your current tools — a pull-through sharpener if you want something quick, a whetstone if you want the sharpest result. Add regular honing to your routine, and your knives will perform at their best for years. A sharp knife makes prep faster, safer, and more enjoyable.