Start by preheating, use light oil, shake basket, and monitor time.
You got an air fryer to cut oil, save time, and still get crispy food. But now you wonder how to start, what buttons to push, and which mistakes to avoid. I have been testing air fryers for years. I have cooked everything from wings to cheesecake. In this guide, I show you how to use air fryer for beginners in simple steps. You will learn setup, preheat, time, oil use, safety, and cleanup. I share the tips that make food crisp, juicy, and even. I also show you the best add-ons and a 7‑day plan to start strong.
Beginner’s Air Fryer Guide to Crispy, Healthy Cooking

This beginner-friendly guide focuses on real-world cooking. It walks you through setup, preheat, and time settings with plain words. The layout is clean. Each section handles one skill at a time. It includes basic cook times for favorites like fries, wings, salmon, and veggies.
What I like most is the value for new users. It covers basket care, safe liners, and how to avoid soggy food. It teaches quick test batches so you do not waste food or time. If you want a single guide on how to use air fryer for beginners, this one makes the first week easy.
Pros:
- Step-by-step method for the first 10 cooks
- Clear time and temp charts for fresh and frozen foods
- Basket care tips to protect nonstick coating
- Oil use advice for better crunch with less fat
- Quick fixes for soggy, dry, or uneven results
- Simple cleaning checklist to extend appliance life
- Beginner-friendly recipes that scale up fast
Cons:
- Focuses on basics; fewer advanced recipes
- Time charts may need small tweaks by model
- Not brand-specific for every interface
My Recommendation
This guide is perfect if you want a clear start and fast wins. It is best for new cooks, busy parents, students, or anyone returning to the kitchen. The layout shows how to use air fryer for beginners in short steps. You follow it once and then you cook by feel. That is the goal.
You get a solid base in air fryer safety, seasoning, and time control. You learn how to use air fryer for beginners with confidence, and you avoid costly mistakes. It gives strong value, and it is easy to keep on the counter as a quick reference. Stock moves fast, so check the link if you want it soon.
| Best for | Why |
|---|---|
| First-time air fryer users | Simple steps show how to use air fryer for beginners without stress |
| Busy weeknight cooks | Quick charts and fixes save time and reduce guesswork |
| Health-focused eaters | Light oil methods give crisp texture with fewer calories |
How an air fryer works in plain words
An air fryer is a small convection oven. A fan pushes hot air around your food. The hot air hits every side. The food browns and turns crisp. You use a lot less oil than deep frying. That is the big win.
Most baskets have holes. The holes let air pass and heat the bottom. Some models have racks. Racks let you cook two levels at once. The heat still needs room to flow. So space matters. This is key when you learn how to use air fryer for beginners.
Unboxing and first-use checklist
- Read the quick start card. It saves you time.
- Pull out the basket and tray. Wash them with warm soapy water.
- Dry all parts well. Water in the basket can cause steaming.
- Run the fryer empty at 400°F for 10 minutes. This burns off factory oils.
- Place it on a heat-safe, flat surface. Leave space around vents.
Set the fryer near an outlet. Keep it away from walls and curtains. Give four inches of space for airflow. Do not block the fan area. Heat needs to escape. This is simple but important.
Basic controls you will use every day
- Temp: Set by degree in Fahrenheit. Most foods cook at 350–400°F.
- Time: Most cooks run 8–20 minutes. Start low and add time.
- Preheat: Some models have a preheat button. If not, just run 2–5 minutes.
- Shake or Turn: Many fryers will beep to remind you. Shake food halfway.
Touch controls differ by brand. But the steps stay the same. Set temp. Set time. Preheat. Add food. Shake. Finish. Check and rest. This pattern is how to use air fryer for beginners without fuss.
Preheating explained: When and why
Preheating helps two things. It improves sear. It shortens cook time. Use it for fries, wings, and thin meats. Skip it for thick roasts or baked goods that need a slow rise.
How long to preheat? Most baskets heat fast. Two to five minutes at your cook temp works. Larger ovens may need six to eight minutes. If your model has a ready tone, follow it. Preheat is one of the top tips for crisp food.
Oil: When, why, and how much
Air fryers cut oil, but oil is still a tool. A thin layer adds crunch. It helps spices stick. It adds flavor. Use one to two teaspoons for a basket’s worth of food.
Choose high smoke point oils. Avocado, refined peanut, or light olive oil work well. Avoid aerosol sprays with propellants. They can harm nonstick coatings. Use a refillable spray bottle. Or toss food in a bowl with oil. Pat food dry first. Dry food browns better.
Basket management: Shake, space, and height
Airflow is king. Spread food in a single layer. Do not pack the basket. A little overlap is fine for fries, but not for breaded fish. If food stacks, it steams.
Shake halfway for small items. Turn larger pieces with tongs. Use a rack if you have one. Racks increase capacity and keep food off pooled juices. This is a core rule in how to use air fryer for beginners and get even browning.
Seasoning basics that stick
Pat meat and veggies dry. Moisture blocks browning. Toss with a little oil. Add salt and pepper. Add spices that like dry heat, like paprika, garlic powder, onion powder, cumin, and chili. Sugar-heavy sauces can burn. Add them near the end.
For breaded items, use a wet-dry method. Dip in egg or buttermilk first. Then coat with crumbs or panko. Press gently. Mist with oil before cooking. This gives a fry-like crust.
Safe liners and foil use
You can use parchment sheets with holes. They protect the basket and reduce sticking. Add liners after preheat. Weight them with food to prevent blow-up near the heater.
Foil works for delicate fish or to shield sauce. Keep foil flat and away from the top element. Do not cover the whole basket base without holes. That blocks airflow. Do not use wax paper. It melts.
Time and temperature cheat sheet
These are starting points. Models vary. Always check early and adjust.
Fresh vegetables
- Broccoli florets: 375°F, 8–10 minutes. Toss halfway.
- Brussels sprouts halves: 380°F, 12–15 minutes. Oil and salt well.
- Carrot sticks: 380°F, 10–12 minutes. Add honey late, optional.
- Asparagus: 370°F, 6–8 minutes. Thin spears cook faster.
Frozen vegetables
- Mixed veg: 390°F, 8–10 minutes. Shake often to avoid wet spots.
- Cauliflower: 390°F, 10–12 minutes. Oil helps browning.
Potatoes
- Fries (frozen): 400°F, 12–18 minutes. Shake twice.
- Fries (fresh, ¼-inch): 380°F, 18–22 minutes. Soak, dry, oil, and salt.
- Wedges: 390°F, 18–22 minutes. Space the pieces.
Chicken
- Wings: 390°F, 18–22 minutes. Pat dry. Sauce after cooking.
- Thighs, boneless: 380°F, 14–18 minutes.
- Breasts: 370°F, 16–20 minutes. Pound to even thickness.
Seafood
- Salmon fillet: 380°F, 8–12 minutes. Do not overcook.
- Shrimp (large): 380°F, 6–8 minutes. Season simply.
- White fish: 375°F, 8–10 minutes. Use foil sling if flaky.
Pork and beef
- Pork chops (¾-inch): 390°F, 10–14 minutes.
- Meatballs: 380°F, 10–12 minutes. Shake or turn.
- Steak (1-inch): 400°F, 8–12 minutes. Rest after cooking.
Baked goods
- Cookies: 320°F, 6–8 minutes. Use parchment.
- Hand pies: 350°F, 12–16 minutes. Vent the top.
Always use a thermometer for safety. Chicken must reach 165°F. Ground meats need 160°F. Pork and fish are safe at 145°F with rest. Reheats should reach 165°F. These numbers help you cook with care.
The best “first week” menu to learn fast
Starting strong makes a big difference. Here is a simple plan that teaches key skills. It shows how to use air fryer for beginners with low stress.
- Day 1: Frozen fries and tenders. Learn preheat and shake.
- Day 2: Salmon and asparagus. Learn timing and gentle handling.
- Day 3: Chicken thighs and Brussels sprouts. Learn two-item timing.
- Day 4: Homemade fries and wings. Learn soak and dry methods.
- Day 5: Veggie medley and tofu. Learn oiling and spice balance.
- Day 6: Pork chops and carrots. Learn rest and carryover heat.
- Day 7: Reheat pizza and bake cookies. Learn leftovers and baking.
Keep notes. Write down temp, time, and changes. Your model will have a “sweet spot” for each food. You will find it fast.
The role of rest time and carryover heat
Food keeps cooking off the heat. This is carryover. Pull salmon at 130–135°F. It will rise to 135–140°F. Let chicken rest five minutes. Juices settle. Meat stays moist.
Rest on a rack or plate. Do not cover tight with foil. That traps steam. It can soften crust. A loose tent is fine for big cuts.
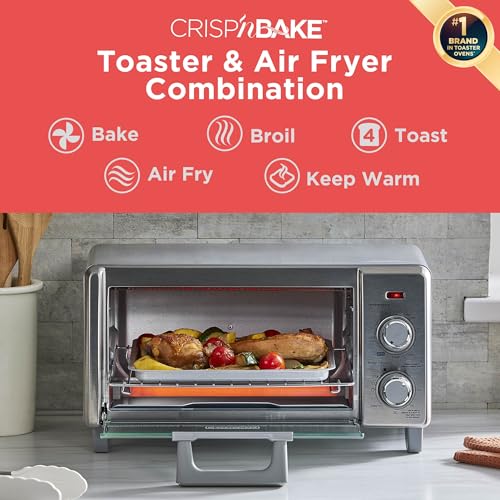
Choosing the right size air fryer
A 4–5 quart basket fits one to two people. A 6–8 quart fits a family. A dual-zone unit cooks two foods at once. A toaster-oven style holds more, but preheats slower. Think about counter space and weight.
If you batch-cook, a larger oven may help. If you cook sides, a compact basket is great. For the best crisp, a basket design often wins. That rapid air hits harder in a smaller chamber.
Accessories that make life easy
- Racks: Add a second layer for wings or bacon.
- Skewers: Cook kebabs without flipping.
- Silicone baskets: Easy cleanup; choose vented designs.
- Parchment liners: Reduce sticking; use the perforated kind.
- Silicone tongs: Protect nonstick coating.
- Instant-read thermometer: Check doneness in seconds.
- Oil mister: Even, light oil for better browning.
- Small ramekins: Great for eggs, molten cakes, and dips.
You do not need all of these to start. Pick a thermometer and oil mister first. Those two improve results right away. That is the core of how to use air fryer for beginners with fewer errors.
Avoiding soggy results
Soggy food comes from wet surfaces and blocked air. Pat foods dry. Do not overload the basket. Use preheat for items that need crunch. Shake or flip. Finish with a one-minute blast at higher heat. This re-crisps the surface.
Sauce at the end. Toss cooked wings in sauce after cooking. Then air fry one minute more to set the glaze. This keeps the skin crisp.
Handling breaded foods
Breadings love dry heat. Start with dry food. Dip in egg. Coat in crumbs. Press gently. Oil the top. Place in the basket with space. Turn halfway. Mist again if needed.
For extra crunch, combine panko with a teaspoon of oil. Stir to coat. This pre-oiled crumb browns better. Season the crumbs, not just the meat. Flavor travels with the crust.
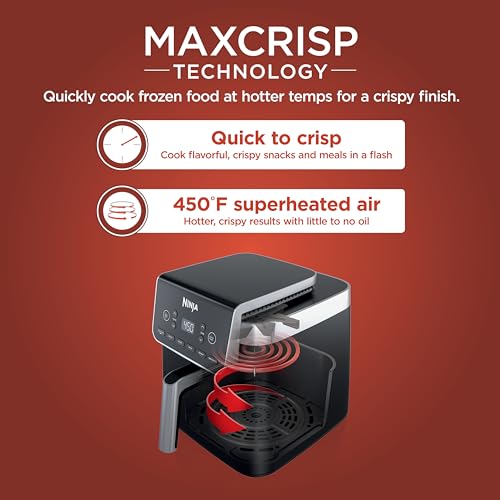
Cooking frozen foods the smart way
Frozen fries, nuggets, and wings are air fryer gold. Most cook best at 380–400°F. Do not thaw. Shake often. Add one to two more minutes for extra crisp.
Some frozen items come pre-oiled. You may not need extra oil. Try a small batch first. That is a safe rule in how to use air fryer for beginners with store foods.
Reheating leftovers
The air fryer revives texture. It beats a microwave for crisp food. Use 300–350°F for 3–6 minutes. Pizza needs 320–340°F, 3–5 minutes. Fried chicken needs 360°F, 6–8 minutes. Fries need 380°F, 4–6 minutes. Shake once.
Do not crowd leftovers. Leave space for air. If cheese is present, lower heat slightly. This stops burning.
Baking in an air fryer
You can bake small batches well. Cookies do great at 300–330°F. Use parchment. Do not preheat too long. Chilled dough spreads less. Watch the first batch. Air fryers bake fast.
Cakes and quick breads need small pans. Use silicone or metal that fits. Reduce oven recipes by about 25°F and start checking early. Rotate pans if your model heats unevenly.
Cleaning and care that protect your basket
Clean after each cook. Let it cool first. Wipe crumbs. Wash basket and tray with warm, soapy water and a soft sponge. Do not use steel wool. Harsh scrubbers scratch nonstick surfaces.
If you have stuck-on bits, soak the tray for 10–15 minutes. For the heater area, use a soft brush after the unit has cooled. Keep vents clear. A clean fryer cooks better and lasts longer.
Food safety and handling
Keep raw meats separate from veggies. Wash hands often. Use different tongs for raw and cooked foods. Use a thermometer. These habits matter more than any recipe.
Know safe internal temps. Chicken 165°F. Ground beef 160°F. Pork 145°F with a short rest. Fish 145°F or until opaque and flakes. Reheat leftovers to 165°F. These numbers cut risk and keep you safe.
Troubleshooting common issues
- Food is dry: Lower temp by 10–20°F. Reduce time. Add a little oil.
- Food is soggy: Preheat. Reduce load size. Shake more. Finish hot for one minute.
- Uneven browning: Flip or rotate. Use a rack. Do not let pieces touch.
- Breadings blow off: Press crumbs on well. Mist oil lightly. Reduce fan speed if your model allows.
- Smoke in the fryer: Clean oil residue. Use a lower temp or higher smoke point oil. Add a little water under the tray if bacon drips.
Flavor builders for fast meals
- Citrus zest with garlic powder brightens veggies and fish.
- Smoked paprika and brown sugar make pork chops pop.
- Lemon-pepper and dill flatter salmon.
- Cumin, chili, and lime work on chicken thighs and corn.
- Soy, honey, and ginger glaze wings in the last minutes.
Use spice mixes to speed dinner. Season generously. Air fryers can dull flavors a bit. A pinch more salt often helps.
Budget and time savers
Batch-cook proteins on Sunday. Make chicken thighs or meatballs. Reheat fast during the week. Roast two trays of veggies. Use them over rice or salads. Freeze portions flat in bags.
Wings, fries, and veg are cheaper in bulk. Keep frozen staples on hand. The air fryer does not need thaw time. That cuts waste. This is a smart part of how to use air fryer for beginners on a budget.
Healthy swaps that still taste great
- Use potato wedges instead of deep-fried fries. Crisp with light oil.
- Air fry breaded eggplant slices for a lighter parm night.
- Swap pork belly bites for chicken thigh bites with spice rub.
- Air fry tofu cubes until crisp. Toss with chili crisp and scallions.
- Roast chickpeas for a crunchy snack.
You keep texture and lose heavy oil. That is the power of air frying.
Cooking for one or two
Choose a smaller basket if space is tight. It heats fast. It is easy to clean. Cook single portions without waste. Cut recipes in half. Watch time. Small batches cook a bit faster.
Use mini pans and ramekins. Bake a single cookie batch or two eggs. This makes the air fryer a daily tool, not a weekend gadget.
Feeding a family
Pick a 6–8 quart basket or a toaster-oven style. Use racks to double capacity. Stagger foods with different times. Start potatoes. Add chicken later. Pull on time. Rest while the second item finishes.
Teach kids safe shaking with oven mitts. They love to help. They learn kitchen skills with clear wins. This also shows them how to use air fryer for beginners in a fun way.
Advanced tips once you master the basics
- Marinades: Pat dry before cooking. Wet surfaces steam.
- Brining: A quick 30-minute brine keeps chicken juicy.
- Double-cook wings: Steam or par-cook, chill, then air fry. Extra crisp skin.
- Dry brine steaks: Salt and rest uncovered in the fridge for an hour. Better browning.
- Dredge with cornstarch: For extra-crisp skin on thighs.
These tricks layer flavor and texture. Use them once the basics feel easy.
Model differences you should know
Basket models run hotter and crisp faster. Oven-style models hold more but may brown less on the bottom. Dual-zone models cook two foods at once. Check if your unit has a shake alert. Some do. Some do not.
Get to know your hot spots. Place thicker pieces where heat hits hardest. Rotate items mid-cook. This small step improves evenness.
How to convert oven recipes to the air fryer
Reduce temp by about 25°F. Reduce time by about 20%. Start checking early. Use a small pan that fits. Keep airflow in mind. If a recipe calls for a sheet pan, you may need to cook in batches.
For casseroles, use shallow dishes. Deep dishes block air. Cover with foil for part of the time to prevent over-browning. Remove foil to finish the top.
Special diets in the air fryer
Air fryers help many diets. Low-carb? Try salmon, chicken thighs, and veggies. Gluten-free? Use cornmeal or almond flour for breading. Vegan? Crisp tofu, tempeh, and chickpeas.
Use the same core steps. Dry food. Light oil. Space pieces. Shake or flip. This simple frame works for almost every diet. It is a universal way to show how to use air fryer for beginners across needs.
Entertaining and game day
Air fryers shine for snacks. Make wings, potato skins, and bacon-wrapped jalapeños. Cook in small batches. Hold finished snacks in a warm oven at 200°F. Toss and re-crisp before serving.
Sauce bars are a hit. Offer buffalo, honey mustard, garlic parm, and BBQ. Toss hot foods in big bowls. Then air fry for one more minute to set the sauce.
Breakfast and brunch ideas
- Air fryer bacon: 360°F, 7–10 minutes. Less mess.
- Breakfast potatoes: 380°F, 15–18 minutes. Shake often.
- Toasted bagels: 350°F, 2–3 minutes. Add butter at the end.
- Frittata cups: 320°F, 10–14 minutes in silicone molds.
- French toast sticks: 360°F, 8–10 minutes. Flip once.
These quick meals save time on busy mornings. They also give you more practice with the controls.
Desserts and sweet treats
- Chocolate chip cookies: 320°F, 6–8 minutes.
- Cinnamon-sugar donut bites: 350°F, 6–8 minutes using biscuit dough.
- Baked apples: 350°F, 12–15 minutes. Butter, cinnamon, brown sugar.
- Molten lava cakes: 350°F, 8–10 minutes in ramekins.
Watch desserts close. Sugar browns fast. A one-minute extra cook can push them from soft to dry.
Staying safe with liners and accessories
Use only accessories that are oven-safe. Silicone and metal are fine. Avoid plastic. Keep parchment and foil away from the top heater. Never preheat with bare parchment. It can lift and touch the element.
Do not use aerosol sprays with propellants. They can damage the basket. Use pump misters or brush oil on food.
Smarter seasoning strategies
Salt early for meats. It draws out moisture, then reabsorbs and seasons deeper. Salt late for crisp veggies to keep snap. Toast spices in a dry pan. Then grind. The aroma jumps.
Try a finishing salt or acid. A squeeze of lemon or splash of vinegar can lift a dish. This bright note helps air-fried foods feel fresh.
The “one-minute finish” trick
When food looks done but lacks crunch, use the one-minute finish. Increase temp by 20–30°F. Cook one to two more minutes. Do not walk away. This step brings snap without drying the inside.
This trick works on fries, wings, and breaded items. It is simple. It is powerful. It is part of how to use air fryer for beginners like a pro.
How to plan your first shopping trip
Buy a mix of fresh and frozen. Pick two proteins you like. Grab two veggies that roast well. Add a bag of frozen fries for training. Get an oil with a high smoke point. Add parchment liners and a small instant-read thermometer.
This cart sets your week for success. You will learn and save money. You will reduce takeout without losing joy at the table.
Storing cooked food
Cool food fast. Store in shallow containers. Keep sauces separate to hold crisp. Reheat in the air fryer, not the microwave, for crunch. Label and date leftovers.
Use the 3–4 day rule for cooked food in the fridge. Freeze portions that you cannot eat soon. Reheat from frozen when needed. The air fryer handles that well.
The psychology of crisp
Crunch signals freshness and flavor. It is a small joy. Air frying gives that joy with less oil. That makes healthy eating feel like a treat. When food is fun, habits stick.
I lean on this idea in every kitchen tip. If you like the result, you will cook again. That is the true heart of how to use air fryer for beginners and stay with it.
Scaling up recipes
Double the amount? Do not double the time. Cook in batches. Keep cooked food warm in a 200°F oven. Re-crisp for one to two minutes before serving. This keeps everything tasting fresh.
If you must cook a big batch, stir or rotate more. Consider a rack. Or upgrade to a larger model if you do this often.
Staying consistent across brands
Each brand heats a little different. That is normal. Start with general times. Check early. Keep notes. You will learn your unit fast.
This is why time ranges are helpful. Treat them as guides, not laws. A few runs in your model will tune your timing well.
When to replace parts or upgrade
If the coating chips, stop using the basket. Replace it. Most brands sell parts. If your fan gets loud, contact support. If the unit no longer heats evenly, it may be time to upgrade.
As new models add dual zones or probes, decide if they fit your life. Do not chase features you will not use. Focus on what helps your daily cooking.
Kitchen safety and kids
Keep cords away from edges. Teach kids to shake with mitts. Do not reach under the heater. Keep paper towels away from the top. Unplug when not in use. Let the unit cool before cleaning.
Safety habits are simple. But they prevent burns and fires. They make your kitchen feel calm.
Putting it all together: The core pattern
- Preheat if you want crisp.
- Dry the food.
- Light oil.
- Season.
- Space and layer smart.
- Shake or flip.
- Check temp for doneness.
- Rest and finish if needed.
- Clean and note your times.
Follow this pattern and you have a system. It is the backbone of how to use air fryer for beginners. It turns fear into flow.
Practice session: Your first three cooks today
- Frozen fries: 400°F, 14 minutes. Shake twice. Finish one minute hot.
- Salmon fillet: 380°F, 9 minutes for a 6-ounce piece. Rest two minutes.
- Broccoli florets: 375°F, 9 minutes. Oil, salt, lemon zest. Toss and serve.
These three cooks teach you temp control, shake timing, and rest. They also cover frozen and fresh foods. You will see fast wins.
Care routine: Five-minute cleanup
- Unplug and cool.
- Wipe crumbs with a paper towel.
- Wash basket and tray with warm, soapy water.
- Dry well. Water causes sticking later.
- Wipe the inside walls with a damp cloth if needed.
Do a deeper clean weekly. Check the heater area. Remove grease build-up. Your fryer will smell better and work better.
Green habits and energy saving
An air fryer heats fast and cooks fast. It uses less power than a big oven for small meals. Cook more at once when it makes sense. Plan batches. Reheat in the air fryer instead of the oven.
These steps save energy. They also save time. Better for you and your bill.
Confidence comes from small wins
Make one change at a time. Add one new recipe each week. Keep seasoning simple. Build your time sense. Use your thermometer. Your skill will grow. Your meals will improve.
Soon, you will guide others on how to use air fryer for beginners. You will have your own notes and tweaks. That is the mark of a confident home cook.
Hacks I use all the time
- Place a slice of bread under fatty foods. It catches drips and reduces smoke.
- For bacon, start in a cold fryer at 300°F. Less curl. Less splatter. Then crisp at 360°F.
- For garlic bread, butter and season first. Air fry at 330°F, 4–6 minutes. Perfect crust.
- For roast nuts, 300°F, 6–8 minutes. Shake often. Season while warm.
These small tricks make daily cooking smoother. They add delight with little effort.
Common myths to ignore
- “You never need oil.” Some foods still need a little oil for crisp.
- “No preheating needed.” Often it helps, especially for crunch.
- “All air fryers are the same.” They are not. Learn your model.
- “You cannot bake in an air fryer.” You can, if you adjust.
Push past these myths. Base choices on your results. That is expert cooking.
Upgrade your seasoning game
Make a house blend. Try 2 parts kosher salt, 1 part garlic powder, 1 part paprika, 1 part onion powder, and ½ part black pepper. Keep it near the fryer. Use it on meats and veg.
Add global mixes. Taco, curry, Cajun, za’atar, and berbere bring range. A small spice shelf opens many doors.
Your first week shopping list (template)
- Proteins: Chicken thighs, salmon fillets, extra-firm tofu.
- Veggies: Broccoli, Brussels sprouts, carrots, asparagus.
- Staples: Potatoes, lemons, garlic, shallots.
- Frozen: Shoestring fries, mixed vegetables.
- Oils: Avocado oil or light olive oil.
- Tools: Parchment liners, instant-read thermometer, silicone tongs, oil mister.
This list covers most first cooks. It supports many fast meals. It keeps waste low.
Final mini-checklist before you press start
- Is the fryer preheated if needed?
- Is food dry and lightly oiled?
- Is there space around each piece?
- Do you know when to shake or flip?
- Is your thermometer ready?
If yes to all, you will likely get a great batch. Enjoy the process.
Honing intuition over time
Senses guide you. Sound tells you when fat renders. Smell tells you when caramelization starts. Sight shows you browning. Touch shows you crust. Use all of these. They build your timing instinct.
This is how a beginner turns into a seasoned cook. It is earned with reps and attention.
FAQs Of how to use air fryer for beginners
Do I need to preheat an air fryer?
Preheat for crisp foods like fries and wings. Two to five minutes is enough. Skip it for thick roasts or bakes.
Can I use aluminum foil or parchment?
Yes. Use perforated parchment or foil with holes. Keep liners weighted with food. Do not block airflow or touch the top heater.
How much oil should I use?
Use one to two teaspoons per basket. Mist or toss lightly. High smoke point oils work best.
How do I clean the basket safely?
Let it cool. Wash with warm, soapy water and a soft sponge. Avoid harsh scrubbers. Dry well to prevent sticking next time.
What foods are best for beginners?
Start with frozen fries, wings, salmon, and broccoli. They teach timing, shaking, and seasoning. Results come fast.
Final Verdict: Which Should You Buy?
If you want a clear, simple start, the Beginner’s Air Fryer Guide stands out. It shows how to use air fryer for beginners with step-by-step help, safe methods, and quick fixes.
Its charts, care tips, and crisp hacks save time and food. You will cook with less stress and more flavor. Check stock and start your first week strong.